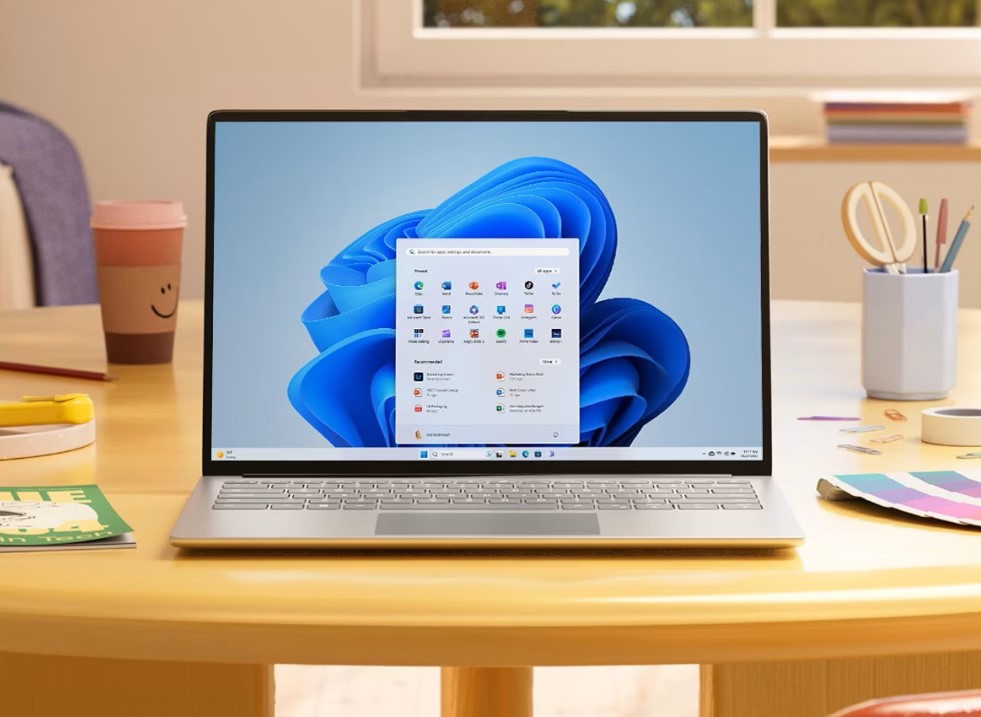
Understanding File History in Windows 11
File History is a powerful feature in Windows 11 that allows users to back up their personal files automatically. It not only protects your data but also makes it easy to recover previous versions of files when needed. Before diving into the setup process, it’s important to understand how File History works and how you can optimize it for your needs.
Key Features of File History
File History continuously saves copies of your files in designated folder locations, making it an ideal solution for safeguarding your important documents, photos, and other valuable data. Here are some of the key features:
- Automatic Backups: Once set up, File History backs up files in specific folder locations automatically, so you don’t have to remember to do it manually.
- Version History: You can restore previous versions of files, allowing you to recover information that may have been lost or mistakenly altered.
- Custom Folder Management: File History enables you to add custom folders to the backup process, ensuring that all your critical data is covered, no matter where it’s stored.
Setting Up Custom Folder Locations
To make the most of File History, you’ll want to customize which folders are included in the backup. Here’s how to add custom folder locations:
- Open Start Menu: Click on the Start button or press the Windows key on your keyboard.
- Search for Settings: Type “Settings” in the search bar and select the result that opens the Settings app.
- Navigate to Backup Options: In the Settings panel, locate the “Update & Security” section, then click on “Backup.” Here, you’ll find options related to File History.
- Add New Folders: Look for the option that allows you to add custom folders to your backup. You can easily do this by selecting the “More options” link under the File History settings.
- Select Folders: In the add custom folder section, you can navigate through your file system to select the desired folders. This ensures that your new folders are included in the backup process.
By customizing folder locations, you can ensure that all relevant data is backed up according to your preferences, maximizing the effectiveness of File History in Windows 11.
Setting Up File History: Choosing Backup Options
Once you’ve accessed the File History settings in Windows 11, it’s time to configure your backup options effectively. This section will guide you through the crucial steps to ensure you can easily restore files when needed.
Step 1: Selecting the Backup Drive
First, you need to choose a location for your backup. Click on the “Select drive” option. Here, you will see a list of available drives. It’s recommended to use an external drive or a network location for better security and accessibility. Once you select a drive, File History will begin to back up your files automatically.
Step 2: Configuring Backup Frequency
Next, you’ll want to set how often File History backs up your files. By default, it backs up every hour, but you can adjust this to meet your needs. To do this, navigate to the “Advanced settings” link in the left pane. Here, you can change the frequency of the backups and specify how long you want to keep the backups.
Step 3: Excluding Folders
You may not want to back up every folder on your system. In the same “Advanced settings” menu, you can add folders to the exclusion list. Simply click “Exclude these folders” and select the folders you want to omit from the backup. This helps streamline your backup process and save space.
Step 4: Restoring Files
When you need to restore files, the process is straightforward. Go to the “Restore personal files” option in the left pane. Here, you will see a user-friendly interface that allows you to browse through your backed-up files. You can navigate to different versions of files or folders effortlessly.
If you’ve deleted a file, you can use the “Restore browse” feature to locate previous versions. For example, if you want to restore a file that you’ve deleted, navigate to the specific folder it was in, and you can see past iterations of that file. This feature is especially useful for recovering lost documents or images that you may have accidentally removed.
Step 5: Resetting or Reinstalling
In cases where you need to reset or reinstall your operating system, having a reliable backup is crucial. Windows Backup Restore allows you to recover your files seamlessly after a reset. Make sure you have the latest backups stored before proceeding with any reset or reinstall operation. This ensures that your important data remains intact and can be easily restored afterward.
By following these steps, you can tailor your File History settings to suit your needs, ensuring that you’re always prepared to restore files, whether they were accidentally deleted or simply need to be accessed from a previous version.
Selecting the Right Drive for File History
When setting up File History in Windows 11, choosing the correct storage location is crucial for ensuring your files are backed up efficiently. You have several options, including using an external drive, a flash drive, or a network location. Each choice comes with its own advantages and considerations.
Using an External Drive
One of the most common methods is to use an external USB drive. These drives are portable and can easily be connected to your computer. Here’s how to set it up:
- Connect your external drive to your computer via a USB port.
- Open Settings and navigate to Update & Security > Backup.
- Click on Add a drive and select your connected external drive from the list.
Using an external drive allows for quick access to your files and ensures that they are stored away from your computer in case of hardware failure.
Utilizing a Flash Drive
If you prefer a more compact option, a flash drive can also serve as a backup location. While typically smaller in capacity than external drives, they can still hold a significant amount of data. Follow the same steps as above to select your flash drive for your File History.
Adding a Network Location
For users who want to back up files to a network folder, Windows 11 allows you to add network location for File History:
- Ensure that your network is configured correctly and that you have access to the folder you wish to use.
- In the Add a drive section, look for your network location. If it’s not listed, you can click on Browse to find the folder on your network.
- Once you locate the folder, select it, and Windows will configure it for use with File History.
This method is particularly useful in a home or office environment where multiple devices may need to access the same backup.
Consideration for Offline Devices
If you’re using an offline device, such as a second computer or a dedicated backup server, ensure that the device is set to allow files available offline. This means that even when you’re not connected to the network, you can still access and manage your backups.
Choosing the Right Drive Type
When deciding whether to use a flash drive, external drive, or a network folder, consider the following:
- Storage capacity: Ensure the drive can accommodate your backup needs.
- Speed: External drives typically offer faster data transfer rates than flash drives.
- Accessibility: Network locations allow multiple devices to access the same backup, which is beneficial in shared environments.
By carefully selecting your backup drive, whether it’s a drive flash or a network location, you ensure that your important files are secure and easily recoverable in case of data loss.
Adding Custom Folders to File History
To enhance your file backup strategy using File History in Windows 11, you may want to add specific folders that contain important documents or files that aren’t included by default. This feature allows you to retain present files in a way that ensures your backups are comprehensive and tailored to your needs.
Steps to Add Custom Folders
- Open File History Settings:
- Navigate to Settings by clicking the Start menu and selecting the gear icon.
- Click on Update & Security and then select Backup from the left pane.
- Access Advanced Settings:
- Under the Back up using File History section, click on the More options link. This will take you to a new window where you can manage your backup settings.
- Adding Custom Folders:
- Scroll down to find the Back up these folders section. Here, you will see a list of folders that are currently being backed up.
- To add new folders, click on the Add a folder button. This action allows you to choose specific folders you want to back up.
- If you need to add folders that aren’t already listed, you can use the Add a folder option. You may need to navigate through your file system to find the desired folders.
- Retaining Present Files:
- If you have files that you want to ensure are included in your backups, you can select them here. The changes button can be useful to modify existing configurations if needed.
- Reviewing Your Backup Options:
- After adding the folders you want, make sure to review the options available to ensure that File History will back up your files as you intended.
Managing Backup Frequency
You can also adjust how often File History backs up your files. In the same More options window, you can select from the dropdown menu to set the frequency, whether it’s hourly, daily, or weekly. This is crucial for ensuring that your files are backed up simultaneously with any changes made.
Important Considerations
While it’s tempting to add every folder to your backup, it’s advised independently to choose only those that are essential. Adding too many folders might lead to longer backup times or storage issues, so be selective. Remember, the aim is to have a comprehensive backup without overwhelming the system.
By following these steps, you can effectively manage your File History settings, ensuring that your critical files and documents are protected and readily available when needed.
Configuring the File History Backup Settings
Once you have accessed the File History tool in Windows 11, the next step is to configure the backup settings to ensure that your important files are being saved correctly. This section will guide you through the essential configurations to make the most out of your file history backup.
1. Choose Your Backup Drive
The first configuration step involves selecting the drive where your history backup will be stored. Typically, this should be an external drive or a network location. To set this:
- Open the File History menu by navigating through Settings > Update & Security > Backup.
- Click on Add a drive and select the appropriate drive from the list. Make sure the drive you choose has enough space to accommodate your history files.
2. Exclude Specific Folders
While backing up all your files can be beneficial, there may be instances where you want to exclude certain folders from the backup. This can help save space and ensure that only relevant data is included. To exclude folders:
- In the File History menu, select Exclude these folders.
- Click on Add to include any folder that you wish to exclude from the backup process.
3. Configure Backup Frequency and Duration
Customizing how often your files are backed up and how long backups are kept is crucial for effective data management. To set this up:
- In the File History menu, look for the option labeled Advanced settings.
- Here, you can choose how frequently you want backups to occur (e.g., every hour, daily) and specify how long you want to keep your history restore files (options range from 1 month to forever).
4. Enable File Versioning
File versioning allows you to recover different versions of files that may have changed over time. This feature can be particularly useful if you need to revert to a previous version of a document. To enable this:
- In the Advanced settings section of the File History tool, you will find options related to file versioning.
- Make sure to enable it and adjust the settings according to your needs.
5. Accessing and Managing Your Backup
Once your configuration is complete, you can easily access your backups whenever needed. To manage your history files:
- Go to the Control Panel and click on File History.
- Here, you can view the status of your backups, restore files, or set up additional configurations if necessary.
By carefully configuring these settings, you can ensure that your files are consistently backed up and easily recoverable. With the right adjustments, your file history in Windows 11 can serve as a robust safety net for your important data.
Configuring File History Settings
Once you have activated File History on your Windows operating device, it’s time to configure the settings to best suit your needs. This process involves customizing how frequently backups occur, which files to include, and other preferences. Follow these complete steps to tailor File History to your requirements.
Accessing File History Settings
- Open Settings: Click on the Start menu and select the Settings icon (the gear symbol).
- Navigate to Update & Security: In the Settings window, find and click on Update & Security.
- Select Backup: On the left sidebar, select Backup. Here, you’ll see the File History option.
Customizing Backup Frequency
To ensure your backups are timely, adjust how often your files are saved:
- Click on More options under the Backup section.
- In the Back up my files dropdown menu, choose the desired frequency. Options typically include Every hour, Every 12 hours, or Daily.
Choosing Which Folders to Back Up
By default, Windows includes your user folders (like Documents, Music, Pictures, and Videos) in the backup. If you wish to include additional folders or files, follow these steps:
- In the Back up these folders section, click on Add a folder.
- Browse through your operating device’s file structure to select the folders you want to include.
- To remove folders from backup, click on the folder and select Remove.
Managing Storage Space
To prevent your storage from filling up quickly, you can set limits on how much space File History uses:
- Scroll down to the Storage sense section.
- Adjust the Keep my backups dropdown to select how long you want to keep older versions of files. Options may include Until space is needed, 1 month, or 3 months.
Excluding Specific File Types
If there are certain file types that you don’t want included in your backups, you can exclude them:
- In the Exclude these folders section, click on Add a folder.
- Select the folders that contain the file types you wish to exclude.
This customization ensures that your backups remain efficient and relevant, containing only the data you need.
Setting Up Notifications
To receive updates about your backups, you can configure notifications:
- In the Advanced settings, look for the option to send email notifications regarding backup status. This feature allows you to stay informed without needing to check manually.
Once you finish customizing these settings, your File History will be better aligned with your workflow, ensuring that your important data is regularly backed up without unnecessary clutter. This setup not only enhances productivity but also provides peace of mind knowing your files are secure on your desktop PC or any other operating device you might use.
Restoring Previous Versions of Files in Windows 11
One of the standout features of File History in Windows 11 is its ability to restore previous versions of files. This functionality can be a lifesaver when you need to revert to a prior state of a document or recover an important file that has been altered or deleted. Here’s how you can effectively navigate this process.
Accessing Previous Versions
To access the previous versions of your files, follow these steps:
- Navigate to the File: Locate the file or folder that you want to restore. Right-click on it.
- Select Properties: From the context menu, choose Properties.
- Go to the Previous Versions Tab: In the Properties window, click on the Previous Versions tab. Here, you’ll see a list of available versions based on the times File History has saved changes.
Choosing the Right Version
In the Previous Versions tab, you might find multiple entries for different points in time. To ensure you select the correct version, look for the time stamps associated with each entry. This will help you identify which version you want to restore based on when changes were last saved.
Restoring a Version
Once you’ve identified the version you want:
- Select the Version: Click on the version you wish to recover.
- Restore or Copy: You have two options:
- Restore: Click the Restore button to replace the current file with the selected version.
- Copy: If you want to keep both versions, you can click the Copy button. This will allow you to save the selected version to a different location.
Saving Changes Properly
After restoring or copying, ensure to save any changes you made in the current version. For files you’ve modified since the last backup, consider using the Save Changes button to confirm your updates. This way, you retain the most current information while also having the option to revert to earlier versions if needed.
Time Point Bearing
It’s crucial to remember that the previous versions you see are based on specific time points when File History created backups. If you don’t see the version you’re looking for, it may be due to the time point bearing of the backups. Regularly backing up your files ensures that you have a comprehensive history to choose from.
In summary, the ability to restore previous versions of files in Windows 11 is a powerful tool that allows you to manage and recover your documents effectively. By understanding how to navigate through this feature, you can better safeguard your important data against accidental changes or deletions.
Configuring Advanced Settings for File History
Once you have enabled File History and chosen your preferred drive, the next step is to customize the settings to suit your needs. The advanced settings allow you to tailor how File History backs up your files, ensuring you have the most relevant data saved efficiently. Here’s how to configure these advanced settings in Windows 11.
Steps to Access Advanced Settings
- Open the Settings Menu: Use the steps to open the Settings application by clicking on the Start menu, then selecting Settings (or simply pressing
Windows + I). - Navigate to Backup Options: From the Settings window, select System and then choose Storage. Look for Advanced storage settings and click on Backup options.
- Access File History Settings: In the Backup options section, you’ll see the File History settings. Here, you can click on More options to access the advanced settings.
Customizing Advanced Settings
In the advanced settings menu, you’ll find a variety of options to customize how File History operates. Here’s a breakdown of the key configurations you can adjust:
- Backup Frequency: Adjust how often File History backs up your files. You can choose to back up your files every hour, daily, or weekly, based on current usage patterns.
- File Retention: Decide how long you want to keep your backups. You can select options such as keeping backups until space is needed or for a specified period (e.g., 1 month, 3 months, or forever).
- Folders to Back Up: By default, File History backs up files in your Libraries, Desktop, Contacts, and Favorites. You can add or remove folders based on your preferences. To add a folder, simply click on Add a folder and navigate to the desired location.
- Exclusions: If there are specific files or folders you do not want to include in your backups, you can specify these under the exclusions section. This could be temporary files or any other files you deem unnecessary to back up.
Utilizing the Advanced Settings
By leveraging these advanced settings, you can ensure that File History is tailored to your specific needs. For instance, if you work with large files that change frequently, you might want to set a shorter backup interval. Conversely, if you primarily handle files that don’t change often, a longer interval might suffice.
Remember to review these settings periodically, especially if your usage patterns change or if you add new important files that require regular backups. Adjusting these settings ensures you maintain an effective backup strategy, safeguarding your critical data with minimal hassle.
By following these steps and utilizing the advanced settings, you can create a file history setup that not only safeguards your important documents but also aligns with your workflow, giving you peace of mind knowing that your current files are always backed up effectively.
Checking and Managing Your File History Settings
After you’ve successfully set up File History in Windows 11, it’s essential to ensure that your backup settings are optimized for your needs. Regularly checking and managing these settings can help you maintain an effective strategy for safeguarding your data.
Accessing File History Settings
To access File History settings, follow these steps:
- Open Settings: Click on the Start menu and select the gear icon to open Settings.
- Navigate to Update & Security: In the Settings window, click on Update & Security.
- Select Backup: From the left-hand sidebar, select Backup.
- Manage File History: Click on More options under the Back up using File History section.
Reviewing Your Backup Files
Within the File History settings, you can review your backup files to ensure that essential documents and folders are being regularly backed up. Here, you can see:
- Backup network folder: If you’re using a network location for your backups, make sure it’s accessible and functioning properly.
- Contents backup files: Check the contents of the backup to confirm that all necessary files are included. You may want to add or remove certain files based on your current needs.
Creating a Specific File Backup
If you realize that you need to create a file backup of specific folders or files that are not included in your regular backup, you can easily do so:
- Click on “Back up now”: This initiates the backup process immediately.
- Select folders: Under the “Back up these folders” section, you can choose which folders to back up.
- Add a folder: Click on Add a folder to include any additional directories that contain vital information.
Prior to Proceeding with Restoration
Before you proceed with restoration, it’s crucial to confirm that you have a recent backup. This ensures that you can recover the latest version of your files. If you need to restore a specific version of a file, follow these steps:
- Go back to the File History settings.
- Click on Restore files from a current backup.
- Browse through the contents backup to locate the desired files.
- Select the file or folder you wish to restore, and click on the Restore button.
Regular Backup Practices
To ensure that you’re always protected against data loss, it’s advisable to regularly back up your files. Setting up a schedule for automatic backups helps maintain your data integrity without the need for constant manual intervention.
- Scheduled backups: You can adjust the frequency of backups in the same settings menu, allowing you to choose how often Windows backs up your files.
- Backup chosen settings: Make sure to review and adjust these settings periodically to accommodate any changes in your file storage needs.
By managing your File History settings effectively, you can create a robust backup system that safeguards your critical data, making restoration a seamless process when necessary.
Troubleshooting Common Issues with File History in Windows 11
Setting up File History is a straightforward process, but you might encounter some common issues along the way. Here are some troubleshooting tips to ensure that your files, including documents, music, pictures, and videos, are being backed up correctly.
1. Check Onedrive Integration
If you’re using OneDrive to manage your files, ensure that your desktop folders are properly synced. Sometimes, files in folders like documents, music, and videos might not appear in OneDrive if they haven’t been uploaded correctly. To check this:
- Open OneDrive and verify that your desktop folders are listed as expected.
- Make sure that the folders containing your important files are included in the OneDrive backup settings.
2. Verify File History Settings
Ensure that File History is set to back up the right folders. You can customize which folders are included in the backup. To do this:
- Go to Settings > Update & Security > Backup.
- Click on More options under the File History section.
- Check that the folders you want, such as those containing music, pictures, and videos, are selected.
3. Ensure Sufficient Storage
File History requires adequate storage space to back up your files and folders. If your backup drive is full, File History may stop working. Check your backup drive’s available space and consider cleaning up old backups or using a larger drive.
4. Check for System Updates
Sometimes, issues arise due to outdated system components. Ensure that your Windows 11 is fully updated. To check for updates:
- Navigate to Settings > Windows Update and click on Check for updates.
- Install any pending updates, as they may resolve issues related to File History and OneDrive integration.
5. Restart File History Service
If File History is not functioning as expected, restarting the service can help. To do this:
- Press Win + R to open the Run dialog.
- Type
services.mscand hit Enter. - Locate File History Service, right-click it, and select Restart.
6. Review Backup History
If you suspect some files haven’t been backed up properly, you can browse the backup history to confirm what’s been saved. You can access this through:
- The File History section in Settings.
- By navigating to the Backup drive where your files are stored.
7. Manually Backup Important Folders
If you find that certain folders like documents, music, or videos are not being backed up automatically, consider manually copying them to OneDrive. This will ensure that your important pictures, music, and videos are always available and safely stored.
By following these troubleshooting steps, you can enhance the reliability of your File History setup in Windows 11, ensuring that all your essential files—whether they’re in desktop folders, music, documents, or pictures—are protected and easily recoverable.